Hunted Down

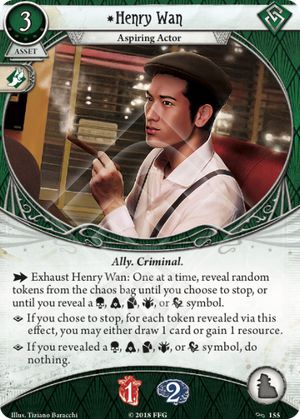
If there are unengaged Criminal enemies in play and they do move to the location of the player who drew the card, do all criminal enemies engage the player who drew the card or can you distribute the enemies between players if there are more of them at the location of the player who drew the card (if the enemies do not have the Prey keyword)?

jurcccy · 2
If there is another investigator at your location when you draw this, and they don't have a prey wording that would force them to only engage you, you can have every single enemy engage the other investigator. This card does not force the enemies who moved to engage you specifically. So, yes. — SGPrometheus · 855
@SGPrometheus : I think you are wrong. The card say "you" twice. So all enemies engage and attack the investigator who drew the card. — Therion · 1
Take Heart

This is kind of a thought-provoking card.

Normally you don't want to fail tests, because failing tests means you lose anything you contributed to the test (skills, resources, items, actions, etc.) in addition to suffering the consequences for failure. Does Take Heart make it worth failing a test?

I think failing a test is normally bad enough that it's not worth deliberately failing in order to get cards and resources. So, I don't think this card will see a lot of play on its own merit. However, I think it has good interactions with the following cards:

Calvin Wright is a natural fit for this card - his low stats guarantee that he is going to fail tests, and so using this card in the beginning will help him get his early-game engine going. Silas Marsh also may want this card because he can contribute it to a test and then pull it back to his hand using his ability if the test succeeds unintentionally. Lastly, Live and Learn can let you fail a skill test, collect the benefit of Take Heart, and then let you take the test again with more cards, resources, and a +2 bonus. That's really good.

I don't know if it's worth a card slot on its own - conventional wisdom is that playing cards to avoid failing tests altogether are normally better than cards that let you salvage something out of the failure - but there are some interesting interactions that I think make this card effective if it's used thoughtfully.

This card is actually good if you play it right. The only real con is that in some scenarios 1 or even 2 of the chaos tokens punish you for failing (the punishment can be allot worst in higher difficulties). I have been using this card on STANDARD difficulty and in my experience this is as good as or (depending on your deck) even better than Emergency Cache... And it is always more fun to play. — Alogon · 1145
Well... Take Heart analysis without even mention about cards like Look what I found? — KptMarchewa · 1
I'm thinking of splashing one for Finn. Just depends on how reliable I think it'll be. I can play it against any mythos card that's testing willpower, is that enough? Maybe evade something with high fighting, then try to attack it without a weapon/help. But that would cost an action. — bigstupidgrin · 84
"Failing" the test here is accidentally succeeding the test. Otherwise it means "spend an action", at least for investigation tests. 2 Ressources + 2 cards (3 with the rabbit foot synergy) is such a great ROI, I would regard it as one of the best cards in the game and not getting hung up on the "failure". — jcdenton · 10
Rise to the Occasion

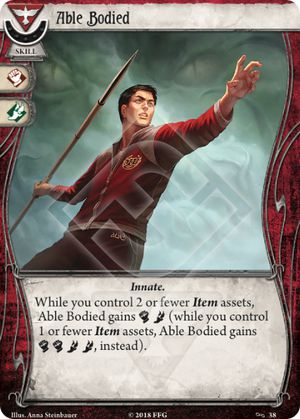
Of the triple skills available at the time, I think that Rise to the Occasion is one of the more difficult ones to use. If the test is that much more difficult than your base skill level, then this card alone is probably not enough to guarantee a success - chances are you're going to need a little extra help.

Generally speaking, I'd normally rather have Unexpected Courage - it's one less icon, but it's much more flexible.

The exception, of course, is Calvin Wright. With base skill values that are all 0, he can use this card on almost every test. In most instances I think he's going to want to take this one with him!

Norman Withers

My basic claim for Norman is that, if you aren't buying the 4-5 XP mystic cards, then you're better off with Daisy Walker (who has access to Higher Education and tome-shenanigans). Norman's strength is that he can go big - so do it. Go Big, or Go Home.

So I like Shrivelling(5) and Grotesque Statue, two of the biggest and most powerful mystic cards. That's 18 XP right there (assuming you don't Arcane Research), and the core of your power. It means you're a Seeker who can drop the pain on enemies if needed, as well as guarantee key passes on Seeker activities with your statues.

Beyond that, my second point is that every time you use Norman's ability, its the equivalent of drawing a card and possibly gaining a resource, so its almost 1-2 bonus actions (ish). In other words, you want to use it as often as you can, every turn if possible. This means he favors events and assets over skills (you can't use his ability to commit cards), and favors lower cost "stuff" that can be played in most situations.

So Working a Hunch, Mind over Matter(don't save it, just use it), Magnifying Glass(0), No Stone Unturned - all these are better for him than for others. Even Emergency Cache and Shortcut are better, as they are playable from the top most of the time, netting you +1 card. Value.

Beyond that you've got St. Hubert's Key and Dr. Milan Christopher or Alyssa Graham. Dr Milan is the best, as always, but Alyssa is still pretty good for Norman, so you could be generous and let a teammate run Dr Milan (maybe even Finn if you are feeling very kind) . The Holy Rosary I feel is a bit of a trap. Despite all the Purple, Norman is still a Seeker at heart and will be Investigating a lot. +int is more valuable to him than +will, and therefore the Key really delivers for him. Plus you're probably not running Arcane Research and your mind is still healthy (ie, the Key sticks around longer).

All of this is standard Norman, irrespective of the campaign. For FA and others where the encounter deck can be rough, I do like Scrying(3), though Mists of R'lyeh is also a fair call for the second Arcane slot. Between them, Ward of Protection, the Statues and potentially other cheats like Counterspell and Time Warp, you should be OK. Dr. William T. Maleson and Seal of the Elder Sign are possibilities too, though you sacrifice a lot for them in terms of the Ally slot or XP. I do also like Protective Incantation just to burn some of the Dr. Milan Christopher money (no Higher Education remember) and FA, on any difficulty, has some pretty horrible tokens in the bag worth sealing. I'm less keen on the Spirit Athame or Crystalline Elder Sign. The latter is a solo card for me, no good for 2+. The former is for pure mystics... Norman should be using his Intellect for searches 75% of the time, with his spells coming out to save the day at key times.

Mystic splashes for me are then Ward of Protection, St Hubert's Key and Delve Too Deep (rotating out once you have XP). Alyssa could sub for one of these if needed. Ideally you want 2 of all of those, so you have hard choices at the start which to drop to 1. It gets easier once you drop the Delves, or on Standalone where Delve is not needed. I try to avoid starting with Shrivelling, as then you are paying XP to bring in your level 0 purples once you upgrade the Shrivelling (which you surely want to do). This means you are probably leaning into Shrivelling(3)/Shrivelling(5) as your very first upgrades then, and running a couple of games building up to "Maximum Firepower!".

I haven't talked much about his Signatures - and to me, they are not that important. His unique deckbuilding and game ability are far more defining. Split the Angle is a bit iffy. If you run Scrying(3), or Alyssa Graham, it sometimes has value, particularly in encounters with obnoxious cards, but even then it's often worth chucking. Without either of those, its just not worth it, and you should never be using the first "waste an action" effect, even on solo. The Vengeful Hound is extremely annoying yes, and you can draw it in the first turn before any actions (truly as horrible as it sounds), but beyond that it's just a bad-guy. Kill it or get your friends to help kill it, then move on.

My one complaint with Norman is that he can feel a bit slow-and-steady. As he often spends a lot of time dropping assets and events, and as he doesn't have access to Higher Education, Pathfinder, Shortcut(2), Deduction(2), In the Know, etc, he doesn't dash around the board hoovering up things really quickly like Ursula or Rex (or Daisy/Minh if you build that way). You just need to let your teammates know that. But he makes up for it by turning up to boss-fights and times of stress with virtually unshakable destruction, as well as being efficient and value-driven in his cards. I really like him, he's quite unique.

I feel Investigator reviews should put their money where their mouth is with a sample deck, so here is my Norman that I've been using for Standalone scenarios.

Standalone Norman - Go Big or Go Home

I agree! The big spells are definitely the way to go. They are pure awesome. — CaiusDrewart · 3200
Take Heart

IMPORTANT: DOES NOT WORK WITH TRY AND TRY AGAIN

The card is added to the effects of step 7, while checking for failure/success is step 6. Super unintuitive, but that's how it works.

Still good though.

Walker · 30
I’d like to see an official response FAQ about that. I completely understand your logic, but there is still a strong argument for it working because TaTA says ‘after’ which means ‘after the triggering condition has fully resolved.’ In this case, the effects of failing a skill test includes step 7. When occurs before and after after all other timing conditions which presumably includes ‘if’ timing. That said, if the timing you propose for TaTA is accurate, it can also allow for a very amusing and unique ability to fail a skill test by a negative amount by returning either Double or Nothing or Dreams of the Deep. — Death by Chocolate · 1490
completely counter-intuitive and a little disheartening, It's been a few months that I play with a combo and a deck that doesn't work! I'm fed up with those games where everything is open to interpretation! And we were a lot like this on the different forums saying it was a pretty good combo and no one told us it did'nt work! It stains my campaign and I'm rather angry! — mogwen · 254
This comment is completely correct, and there's no rules ambiguity. Try and Try Again is triggered after the failure of the skill test, which is Step 6 of the skill test resolution framework. Take Heart is not a response effect triggered when the skill test fails, but like other Skill cards instead modifies the consequences of the skill test, which are resolved in Step 7 of the skill test. This is made clearer in the FAQ. As such, if you Try and Try Again to return Take Heart, it will be removed from the skill test before it is able to resolve. — Dai · 1296